We may earn money or products from the companies mentioned in this post.
Hypothermia is the most immediate danger among those lost or stranded in the wilderness. In winter, loss of body heat can set in within minutes. Knowing how to build an emergency snow shelter to protect yourself from the cold can make the difference between life and death.

How to Build an Emergency Snow Shelter
There are three different types of emergency snow shelters: snow and brush shelter, a snow cave, and an igloo. An igloo is a specialized build that requires a woodsman’s knife and more hardened snow than most places have so that this article will describe only the snow cave and the snow and brush shelter.
If you are in the mountains, watch out for signs that your location is subject to avalanches, such as snapped trees or a rough pile of snow near the bottom. Safe valleys will have lots of trees and saplings and have a shallow slope. The slope is too steep if you have difficulty climbing up and down in standard snow boots.
Snow and brush shelter
In this kind of emergency snow shelter, the brush is used as the skeleton of the shelter, and the snow is added for insulation. It is the best type of shelter to use in wooded areas.
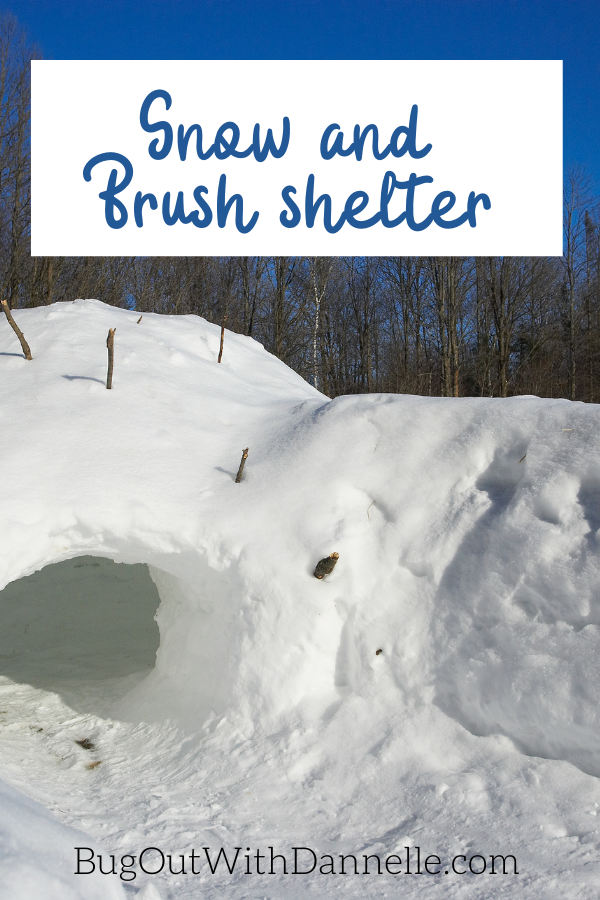
Start by finding a small thicket of bushes or saplings on the lee side of a valley. This thicket will anchor your snow and brush shelter. If you can’t find a thicket, use a log or a tree trunk to anchor your thicket. A tree in a small copse of trees is perfect.
Use a few large bushy branches from the thicket to create the framework of your brush shelter. Secure the base of these branches firmly in the snow a few feet away from your anchor. They should form a curve or V towards your anchor.
Leave an opening on the lee side of your shelter. This opening will become your entrance. Weave smaller branches into your framework horizontally, working from bottom to top until you have closed off the roof area, and most of the area is covered.
Now that you have your framework start piling on the snow. Make the walls nice and thick, until there is no place you can see out except your entrance. All that snow will be your insulation.
Place more leafy branches on the floor to insulate yourself from the ground. Set aside another large, leafy branch to serve as a door. Don’t worry about plugging those spaces. They will provide you with fresh air.
Snow Cave
A snow cave is the best form of emergency shelter to build when there is nothing but snow to work with. It is easiest to make a snow cave using a shovel, but in an emergency, even your gloved hands will do.

Start by finding some good, deep snow on the lee side of a valley. Ideally, the snow should be nearly as deep as you. If you don’t have a convenient snow base, snowbank, or snowdrift, you will have to pile up the snow until it is high enough, but this only works if it is not granular snow. Use more snow than you think you will need. At worst, you will have some extra insulation.
If you had to pile together snow to get enough, you would have to let it sit undisturbed for at least an hour. This time is needed so that it can start bonding together. Otherwise, all you have is a pile of loose snow, which will collapse when you start digging into it. It can even collapse entirely so that you can’t dig your way out again.
Once you have enough deep snow and it has had a chance to settle, start tunneling. If you are working in deep snow, dig a trench down into the snow first. Then pile the snow on top of what is going to be the roof of your snow cave.
Once you get a trench deep down enough so that the snow is at head level, start tunneling in at about knee level. The tunnel should be large enough for you to crawl in, but not much larger. Push the excavated snow out behind you with your feet. Work your way slightly upwards as you dig the tunnel. This will keep the warm air inside.
Shape the inside of your snow cave so that it is dome-shaped and smooth. This shape will keep water from dripping down on you as the temperature inside your snow cave rises. Over time, your ceiling will settle by a few inches a day as the snowpack settles above you. This settling is not a problem. Just keep reshaping it each time.
If time is very short, skip all that and dig a compartment into the lee of the drift or pile that is large enough for you to fit if you are sitting down. Once you are inside, you can make the inside a little larger, piling the excess snow at the lip of the compartment. Use garbage bags, your pack, or whatever else you have to insulate you from the ground and make a door.
Tips for all snow emergency shelters
Build your emergency shelter as small as possible.
The smaller and snugger you build your shelter, the better it will hold your body heat, and the more stable the walls will be. The highest point of your shelter should not be more than 3-4 feet, roughly the same size as a pup tent. This size should give you enough space to sleep comfortably and not too much more.
For extra heat, build a small fire outside your shelter, then bring the warmed rocks inside and wrap them in a cloth to hold the heat. In a snow cave, you can light a candle inside, but no more than that. Set your heat source deep into the shelter, but be careful not to knock it over. You can build a small snow shelf to hold your candle, but not for fire-warmed rocks.
Always make a ventilation hole to the lee of your shelter and keep it clear. You may have to clear it repeatedly if the snow outside is falling thickly and drifting. This is especially important if you use a candle.
Snow muffles sound.
You won’t be able to hear people looking for you, so make it easy for them to see you. A bright-colored garbage bag on the outside, anchored with branches, rocks, or heavy snow and ice, makes it easy for searchers to find you.
Daylight is valuable.
The colder it gets at night, the sooner daylight fades. For this reason, you should start building your emergency shelter immediately upon realizing that you are not going to make it to a safe area in time. After you have finished creating your emergency snow shelter, crawl inside and get a good night’s sleep, so that you can evaluate your situation in the morning with fresh eyes.