Bushcraft Knives Essentials: Choosing the Right Blade for Survival Skills

When venturing into the woods, reliable bushcraft knives can be your best companion for wilderness survival and general outdoor use. These knives are designed not just for cutting, but as versatile tools that can handle tasks from woodcarving and fire starting to game processing. The ideal bushcraft knife is robust with a full tang, sharp edge, and comfortable handle that withstands rigorous usage.

Bushcraft Knives Cover Image

The craftsmanship of bushcraft knives is as diverse as their uses. With a variety of blade shapes and sizes, handle materials, and specific design features for different tasks, there is a knife out there that can cater to your particular bushcraft needs.

Whether you prefer the compact and tried-and-true design of a Morakniv, or the rugged, field-tested construction from the likes of ESEE or Benchmade, selecting the right bushcraft knife hinges on personal preference and practical functionality.

In choosing the best bushcraft knife, factors such as blade material, edge retention, ease of sharpening, and overall durability play a crucial role. A stainless steel blade might resist corrosion well, whereas high-carbon steel could offer easier sharpening and a finer edge.

A comfortable grip maximizes control and reduces hand fatigue, enhancing your efficiency in bushcraft tasks. It’s about finding the balance between resilience, ergonomics, and utility to meet the challenges of the great outdoors.

History of Bushcraft Knives

Bushcraft knives trace their lineage back to the tools essential for survival in the wild. Mors Kochanski, a Canadian survival expert, popularized the term “bushcraft knife” in the 1980s through his influential book, Bushcraft: Outdoor Skills and Wilderness Survival.

Before this period, your concept of a survival knife would be rooted more in improvised tools or adaptations of everyday cutlery, rather than the specialized gear we recognize today.

Features Over Time

The evolution of the bushcraft knife has been influenced by geographical needs and available materials.

  • 18th Century: Knives like the Hudson Bay Camp Knife served traders and trappers in North America.
  • Early 20th Century: Figures like Horace Kephart advocated for knives suited to camping and woodcraft, emphasizing functionality over form.

Design Influence

Your bushcraft knife today is likely to be robust and designed for a range of tasks from carving wood to preparing food. It generally features a full-tang construction, a fixed blade, and a handle crafted for a comfortable grip conducive to prolonged use.

Cultural Impact

Knives hold cultural significance, with designs varying significantly around the globe. In Europe, tools like billhooks have played a role similar to bushcraft knives elsewhere, attesting to the universal need for a reliable blade in the wild as noted in Bushcraft – Wikipedia.

When selecting your bushcraft knife, you’re participating in a tradition that spans continents and centuries—a blend of practical expertise and historical usage.

Types of Bushcraft Knives

When selecting a bushcraft knife, your choices will primarily revolve around three types: fixed blade, folding, and custom knives. Each has its distinct features suited to various tasks and preferences in the wild.

Fixed Blade Knives

Fixed-blade knives are renowned for their reliability and are commonly preferred for their durability and strength. These knives have a solid construction without moving parts, which means they can withstand significant stress and are easier to maintain.

Bushcraft Knives fixed-blade knife

According to GearJunkie, the White River Ursus 45 is an exceptional example of a fixed-blade knife, offering a high-quality blade and a comfortable grip for rigorous bushcraft tasks.

Folding Knives

While folding knives might not match the robustness of fixed blades, they offer the advantage of being compact and safe to carry. Their blade folds into the handle, which makes them a versatile option for those who prioritize portability.

The Helle Bleja is noted for being a high-quality folding knife, with a design that provides a balance between functionality and convenience.

Custom Bushcraft Knives

For those seeking a personalized option, custom bushcraft knives provide the opportunity to have a knife tailored to specific needs and preferences. These knives are crafted by skilled artisans and can be made to order with various materials, blade shapes, and handle designs.

Custom knives can be more expensive, but they offer unique qualities that mass-produced knives do not. They can be conversation pieces as much as functional tools, and enthusiasts argue they are worth the investment for the performance and craftsmanship they offer.

Essential Features of Bushcraft Knives

Selecting the right bushcraft knife is crucial for your wilderness adventures. Here, you will learn about the essential features that make a knife reliable and versatile.

Blade Material

Your bushcraft knife’s blade should be made from high-grade steel that balances toughness and edge retention. Stainless steel like 440C is corrosion resistant and maintains sharpness well, as seen in the ESEE-4.

Alternatively, carbon steel such as 1095 is known for its durability and ease of sharpening.

Handle Design

The handle should provide a secure grip in various conditions and not cause hand fatigue. Materials like G10, Micarta, or textured hardwoods are preferred for durability and comfort. Some knives, such as the White River Ursus 45, offer excellent ergonomics and grip security.

Knife Tang

Always opt for a full tang design where the blade steel extends to the bottom of the handle, as it ensures maximum strength. Full tang construction is essential for heavy-duty tasks like batoning wood or building shelter.

Blade Shape

A drop-point or clip-point blade shape is ideal for versatility in bushcraft tasks. The Helle Bleja showcases a practical blade shape for precision work and efficient cutting.

Edge Grind

The blade’s edge grind directly impacts its cutting ability and ease of maintenance. A Scandinavian grind is widely preferred in bushcraft knives due to its robust edge and ease of sharpening in the field.

How to Choose the Right Bushcraft Knife

When looking for the ideal bushcraft knife, it’s crucial to consider its intended use, how it feels in your hand, the materials it’s made of, and the price.

Purpose and Usage

Your choice of bushcraft knife should align with its intended primary use. Whether you’re carving wood or preparing food, the functionality of the knife is paramount. Evaluate the blade shape and edge type. For example, a knife with a full tang provides more strength for batoning wood.

Personal Comfort and Fit

Bushcraft Knives handle size and material is important

The ergonomics of the knife are central to preventing fatigue and blisters. Check the handle size against your hand; it should not be too small if you have large hands. The handle material, whether wood, rubber, or bone, should offer a firm and comfortable grip.

Durability and Reliability

The best bushcraft knife withstands the elements and the test of time. Consider the blade material; stainless steel is less likely to rust, while carbon steel retains a sharp edge longer. A fixed-blade knife is generally more durable than a folding knife and is recommended for bushcraft.

Budget Considerations

Bushcraft knives come in a range of prices. You can find a solid starting point for an all-around bushcraft knife without breaking the bank. However, investing in a higher-quality knife can lead to better performance and longevity. Balance your needs with what you’re willing to spend.

Knife Care and Maintenance

Proper care extends the life of your bushcraft knife, ensuring it remains reliable for every outdoor adventure. It involves regular cleaning, precise sharpening, and diligent rust prevention.

Cleaning and Storage

Cleaning: After each use, remove debris from your knife. If the blade is high carbon steel, clean it with water and a paste made from baking soda to neutralize acids. Stainless steel variants can be washed with dish soap and water. Always dry your knife thoroughly.

Storage: Store your knife in a dry place separate from its sheath. If the sheath is leather, this will prevent moisture retention which can lead to corrosion.

Sharpening Techniques

Sharpening Stone: Use a whetstone or diamond stone with a lubricant such as water or oil. Start with a coarser grit to remove any nicks, progressing to a finer grit for a sharp edge.

Stropping: After sharpening, strop your knife with a leather strop to align the edge, giving it a razor-sharp finish.

Rust Prevention

Oiling: For high-carbon steel knives, apply a thin coat of oil to the blade to create a barrier against moisture.

Environment: Avoid leaving your knife in damp environments. When not in use, preventive oiling is especially crucial for long-term storage.

Bushcraft Knife Safety

Safety is paramount when handling bushcraft knives. Keep in mind proper handling, carrying, and first aid procedures to prevent accidents and ensure a safe outdoor experience.

Handling and Usage

Always:

  • Keep your knife sharp; a dull blade requires more force and is more likely to slip.
  • Cut away from your body to minimize the risk of injury.

Never:

  • Use the knife for prying or as a screwdriver; this can damage the blade or handle.

Carrying Methods

For fixed-blade knives:

  • Use a sheath that covers the blade entirely.
  • Attach the sheath to your belt on your dominant side for easy access.

For folding knives:

  • Engage the lock mechanism, if available, before placing it in your pocket.
  • Consider a clip or lanyard for secure and accessible carrying.

First Aid for Knife Injuries

In case of a cut:

  • Apply direct pressure to the wound with a clean cloth.
  • Elevate the injured area above heart level to slow bleeding.

For more severe injuries:

  • Seek immediate medical attention.
  • Keep a first aid kit accessible whenever you are using your bushcraft knife.

Bushcraft Skills and Knife Usage

In bushcraft, your knife is not just a tool; it is your lifeline. It is essential for performing tasks crucial for survival in the wild, from fire building to shelter construction and food procurement.

Fire Building

Bushcraft Knives ferro rod for fire making

Your bushcraft knife allows you to craft kindling and shave wood to create a pile of fine, easily ignitable materials. You’ll use your knife to strike a ferro rod equipped with one, like the Morakniv Companion Spark, to generate sparks and ignite your tinder.

  • Step 1: Use your knife to create a tinder bundle from dry grass, leaves, or shavings.
  • Step 2: Carve a notch and create a fire board for your bow drill setup, if needed.

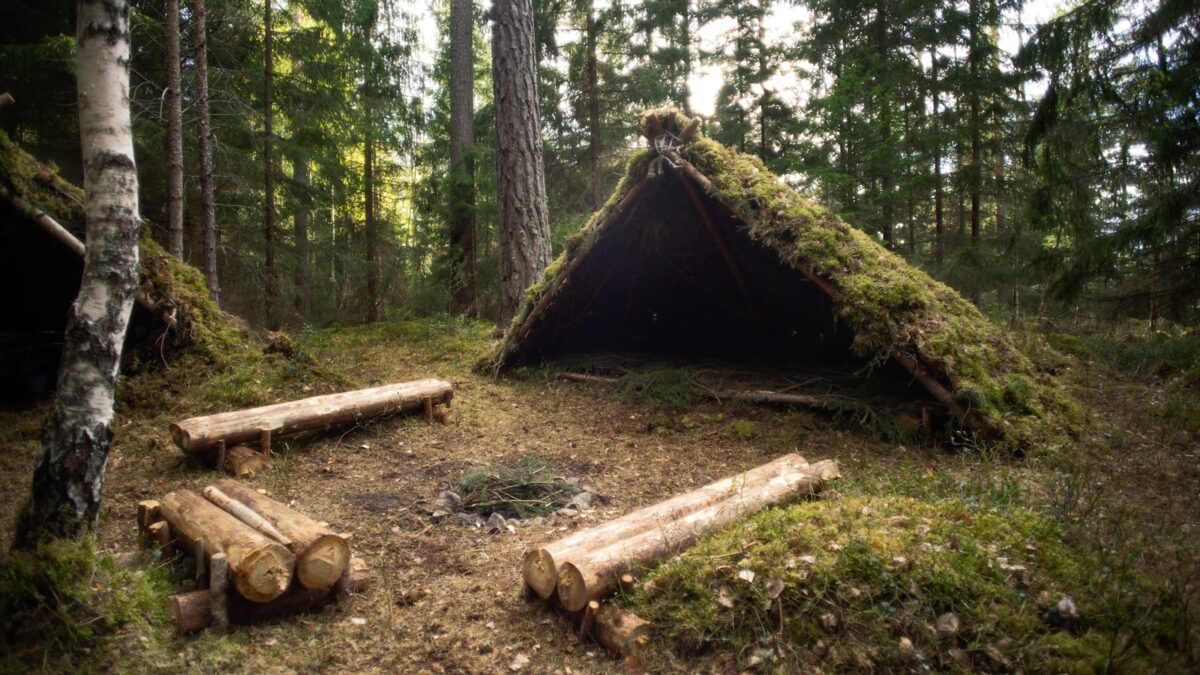
Shelter Construction

A durable, sharp bushcraft knife is used to cut and shape natural materials to construct shelters. You’ll rely on your knife to cut notches in wood to create stable frameworks and trim foliage for covering.

  • Cutting Technique: Notch limbs and branches to create interlocking joints.
  • Trimming: Shape branches and foliage to reinforce your shelter.

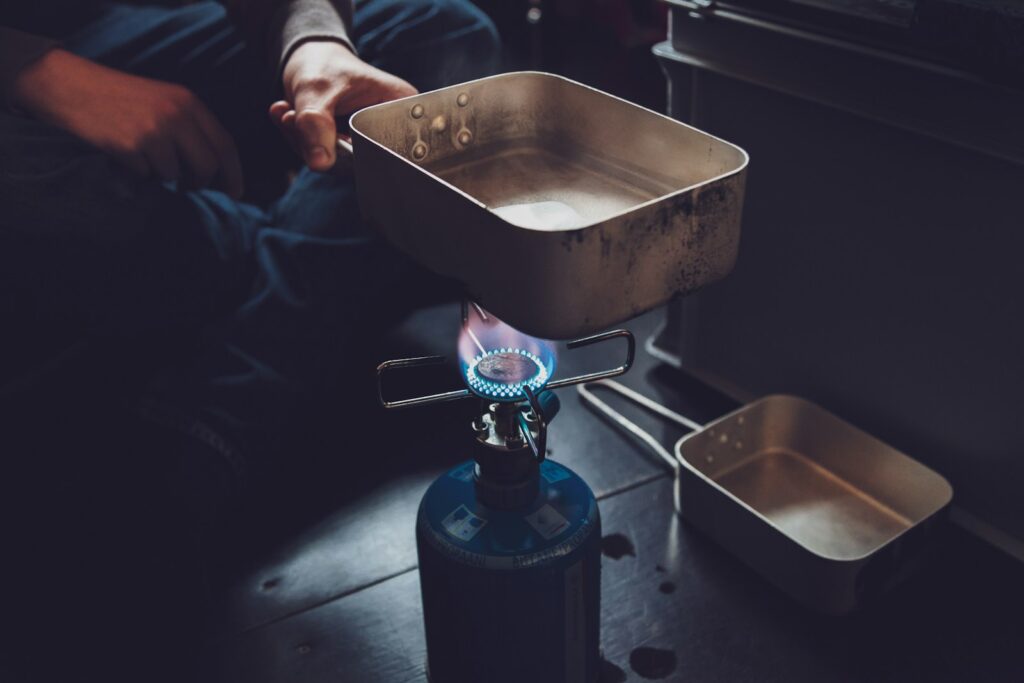
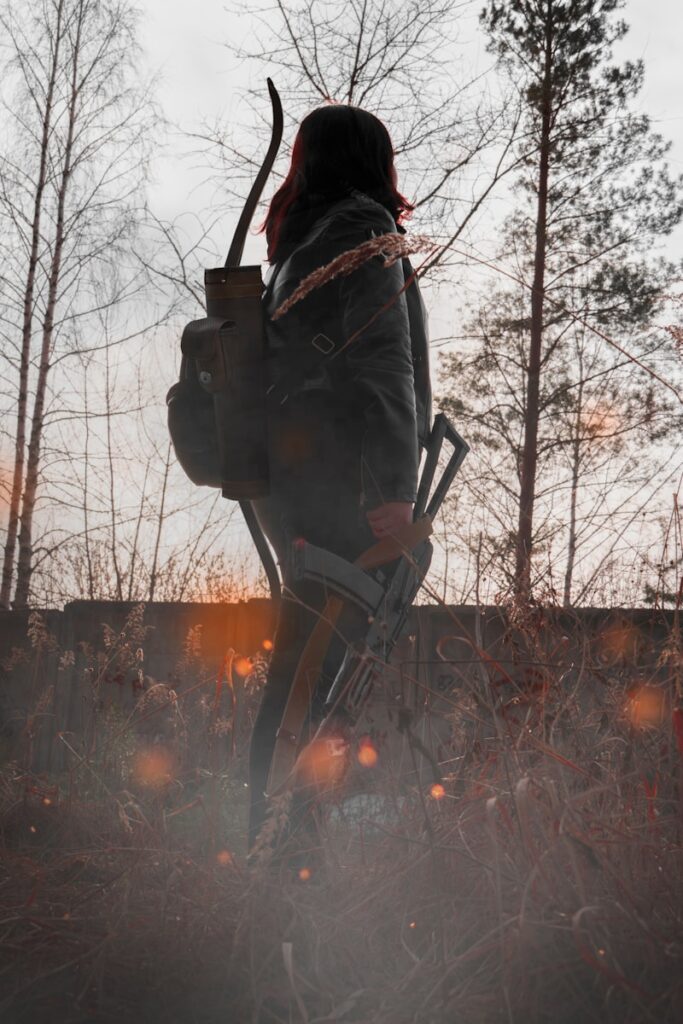
Food Preparation and Hunting

When hunting or fishing, a bushcraft knife like the ESEE-4 is versatile for cleaning and preparing game. It is equally important for processing edibles, peeling bark for medicinal uses, or preparing cooking tools.

  • Cleaning Game: Use your knife for skinning and gutting fish or game.
  • Prepping Plants: Peel and cut plants or fruits for safe consumption.

Frequently Asked Questions

When exploring bushcraft knives, specific features and design elements elevate a good knife to a great one. The material, build, and blade type play critical roles in functionality and performance.

What characteristics define the best bushcraft knife?

The ideal bushcraft knife typically features a robust, fixed blade with a full-tang design for strength. Superior steel with high carbon content is often favored for its edge retention and ease of sharpening.

Additionally, the best bushcraft knives include a comfortable, durable handle and a blade shape designed for versatility.

How do full-tang bushcraft knives compare to partial-tang ones?

Full-tang knives, where the blade metal extends the full length of the handle, offer greater stability and durability, crucial for heavy-duty tasks. Partial-tang knives, though lighter, may not withstand the same level of abuse without bending or breaking.

What are the advantages of a fixed blade in bushcraft knives?

Fixed blades are stronger, more reliable, and easier to clean than folding knives. Without moving parts, there is less chance of mechanical failure, making fixed blades a go-to for demanding bushcraft tasks that require a reliable cutting tool.

How do bushcraft knives differ from typical survival knives?

Bushcraft knives tend to have a finer edge and a more substantial handle, geared toward precision work like carving and crafting. Survival knives usually have a thicker blade and may include additional features like serrations for sawing or survival tools integrated into the handle.

What are some reputable brands that specialize in bushcraft knives?

Prominent brands known for their bushcraft knives include Morakniv, with models like the Companion and Bushcraft Black being popular choices, and Benchmade, recognized for the premium Benchmade Bushcrafter 162.

Which blade shapes are considered the most effective for bushcraft activities?

The most effective blade shapes for bushcraft activities are typically the Scandi grind, widely utilized in the industry, and the flat grind, known for its versatility and sharpness. These grinds offer superb control and are excellent for carving and precision cutting necessary in bushcraft scenarios.

Nutrient-Survival Food: The Ultimate Guide to Long-Term Food Storage

Are you tired of worrying about the expiration dates of your canned goods and non-perishables? Do you want to be prepared for any emergency or disaster without sacrificing the quality of your food? Look no further than nutrient-survival food.

Nutrient Survival Food Cover Image

Nutrient survival food is a relatively new concept in emergency preparedness. Unlike traditional canned goods and non-perishables, nutrient survival food is designed to provide a balanced and complete meal with all the necessary nutrients for survival.

These meals are created with a focus on long-term storage and have a shelf life of up to 25 years, making them a reliable option for any emergency.

What Is Nutrient Survival Food?

If you love to explore the great outdoors or are simply preparing for emergencies, you’ve probably heard of nutrient survival food. This type of food is designed to provide you with all the essential nutrients your body needs to survive in a compact and easy-to-store package.

Nutrient survival food is typically made up of freeze-dried or dehydrated ingredients carefully selected to provide a balanced mix of protein, carbohydrates, and fat. These meals are often fortified with additional vitamins and minerals to ensure your body stays healthy.

One of the biggest advantages of nutrient survival food is its long shelf life. Unlike fresh food, which can spoil quickly, nutrient-survival food can last for years if stored properly. This makes it a great option for anyone who wants to be prepared for emergencies or to stock up on food for future adventures.

In addition to being nutritious and long-lasting, nutrient survival food is also incredibly convenient. Most meals can be prepared quickly and easily with just a little water, making them perfect for camping trips, hiking excursions, or any other outdoor activity where you need a quick and easy meal.

Nutrient survival food is a great option for anyone who wants to stay healthy and prepared for any situation. With its long shelf life, balanced mix of nutrients, and convenient preparation, it’s a must-have for any outdoor enthusiast or emergency prepper.

Benefits of Nutrient Survival Food

Optimized Nutrition

When it comes to survival situations, getting the right nutrients is crucial for your health and well-being. Nutrient survival food is designed to provide you with all the essential vitamins and minerals your body needs to function properly.

These foods are often fortified with additional nutrients to ensure that you’re getting everything you need, even in the most challenging circumstances.

Long Shelf Life

One of the most significant benefits of nutrient survival food is its extended shelf life. Unlike traditional foods, which can spoil quickly, nutrient-survival food can last for years without going bad.

This means you can stock up on these foods and have them on hand for emergencies without worrying about them going to waste. This is especially important if you live in an area prone to natural disasters or other emergencies.

Convenience and Portability

Nutrient survival food is incredibly convenient and portable, making it an ideal choice for anyone who needs to be on the move.

These foods are often packaged in lightweight, easy-to-carry containers, perfect for backpacking, camping, or other outdoor activities. They’re also easy to prepare, requiring little more than water to be ready to eat.

Nutrient survival food is an excellent choice for anyone who wants to be prepared for emergencies or other challenging situations. With its optimized nutrition, long shelf life, and convenience, it is a smart investment that can help ensure your health and well-being in even the most challenging circumstances.

Key Ingredients in Nutrient Survival Food

Protein Sources

Protein is an essential nutrient that helps repair and build tissues in your body. In nutrient survival food, protein sources include meat, poultry, fish, and plant-based proteins such as beans, lentils, and quinoa.

Nutrient-Survival Food fish, legumes and quinoa

These protein sources are important to include in your diet to maintain muscle mass and support your immune system.

Vitamins and Minerals

Vitamins and minerals are necessary for the proper functioning of your body. Nutrient survival food includes a variety of vitamins and minerals such as vitamin C, vitamin D, zinc, and iron. These nutrients are crucial for maintaining good health and can help prevent deficiencies that can lead to illness.

Carbohydrates and Fats

Carbohydrates and fats are important sources of energy for your body. Nutrient survival food includes complex carbohydrates such as whole grains, as well as healthy fats such as nuts and seeds. These foods provide sustained energy and can help keep you feeling full and satisfied.

Nutrient survival food includes a variety of key ingredients such as protein sources, vitamins and minerals, and carbohydrates and fats. By including these important nutrients in your diet, you can maintain good health and support your body’s overall functioning.

Types of Nutrient Survival Products

Meal Replacement Options

When it comes to survival situations, meal replacement options can be a lifesaver. They are designed to provide all the nutrients your body needs to keep you going. Meal replacement options come in different forms such as powders, bars, and shakes. They are easy to store and can last for a long time.

Powders are a great option as they are versatile and can be mixed with water or other liquids to create a nutritious meal. Bars are perfect for on-the-go situations and can be easily packed in your survival kit. Shakes are a convenient option for those who prefer a liquid meal.

Snacks and Drinks

Snacks and drinks are a great way to keep your energy levels up throughout the day. They come in a variety of forms such as jerky, trail mix, and energy drinks. Jerky is a great source of protein and can be stored for a long time.

Nutrient-Survival Food trail mix

Trail mix is a combination of nuts and dried fruits that provide a quick energy boost. Energy drinks are a convenient option for those who need a quick pick-me-up.

Specialized Survival Kits

Specialized survival kits are designed to provide all the necessary nutrients your body needs in emergencies. They come in different forms such as earthquake kits, hurricane kits, and survival kits. These kits contain a variety of foods such as canned goods, freeze-dried foods, and water. They are easy to store and can last for a long time.

Nutrient survival products come in different forms and are designed to provide all the nutrients your body needs in emergencies. Whether you prefer meal replacement options, snacks, drinks, or specialized survival kits, there is an option that will suit your needs.

How to Store Nutrient Survival Food

When it comes to storing nutrient-survival food, there are a few things you need to keep in mind to ensure that your food stays fresh and safe to eat. Here are some tips to help you properly store your nutrient survival food.

Keep it Cool and Dry

One of the most important things to remember when storing nutrient survival food is to keep it cool and dry. This means storing your food in a cool, dry place, away from direct sunlight, moisture, and humidity.

Ideally, you should store your food in a location with a temperature of around 60°F (15°C) and a humidity level of less than 60%.

Use Airtight Containers

It’s also important to store your nutrient-survival food in airtight containers. This will help to keep out moisture, air, and pests, which can all cause your food to spoil or go bad. You can use plastic storage containers, Mylar bags, or even vacuum-sealed bags to store your food.

Rotate Your Stock

Another important tip for storing nutrient survival food is to rotate your stock regularly. This means using the oldest food first and replacing it with fresh food. By doing this, you can ensure that your food stays fresh and doesn’t go bad, which can be especially important in an emergency.

Label Your Containers

Finally, label your nutrient survival food containers with the date of purchase or expiration. This will help you keep track of when your food was purchased and when it needs to be replaced or rotated. You can also label your containers with the type of food inside, which can be helpful when you’re trying to find a specific item in your stockpile.

By following these simple tips, you can ensure that your nutrient-survival food stays fresh, safe, and ready to eat when you need it most.

Preparing Nutrient Survival Meals

Cooking Instructions

Preparing your nutrient-survival meals is easy. Most meals come in a pouch or a can, which makes them easy to store and carry. To prepare your meal, you need a stove, some water, and a pot.

  1. Start by boiling water in a pot. The amount of water you need depends on the meal you are preparing. Check the label on the pouch or can for instructions on how much water to use.

  2. Once the water is boiling, add the contents of the pouch or can to the pot. Stir well to ensure that the contents are evenly distributed.

  3. Reduce the heat and let the meal simmer for the recommended time. This can vary depending on the meal, so check the label for instructions.

  4. After the recommended time has passed, remove the pot from the heat and let it cool for a few minutes.

  5. Your nutrient survival meal is now ready to eat. You can eat it straight out of the pot or transfer it to a bowl or plate.

Water Requirements

Water is essential for preparing nutrient-survival meals. You will need to have access to clean and safe drinking water to prepare your meals. The amount of water you need depends on the meal you are preparing, but as a general rule, you should have at least one liter of water per meal.

It’s important to note that not all water sources are safe for consumption. If you are unsure about the safety of your water source, you should purify it before using it to prepare your meals. You can use a water filter or purifying tablets to make sure that your water is safe to drink.

In conclusion, preparing nutrient-survival meals is easy. With a stove, some water, and a pot, you can have a nutritious meal ready in no time. Just follow the cooking instructions on the label and have access to clean and safe drinking water.

Nutrient Survival Food in Emergency Situations

Disaster Preparedness

Nutrient-Survival Food natural disasters

When disaster strikes, it’s important to have a supply of nutrient survival food. Whether it’s a natural disaster like a hurricane or earthquake, or a man-made event like a power outage or civil unrest, having access to food that provides the necessary nutrients can help you stay healthy and alert during a crisis.

One option for nutrient survival food is freeze-dried meals. These meals are lightweight, easy to store, and have a long shelf life. They also come in a variety of flavors and can be prepared with just hot water, making them a convenient option for emergencies.

Another option is energy bars. These bars are packed with calories and nutrients, making them a great option for when you need a quick boost of energy. They’re also compact and easy to store, so you can keep them in your emergency kit or your car for when you’re on the go.

Outdoor Adventures

Nutrient survival food isn’t just for emergencies. It’s also important to have when you’re out on an outdoor adventure, whether hiking, camping, or backpacking. When exerting a lot of energy, your body needs fuel to keep going.

One option for outdoor adventures is dehydrated meals. These meals are lightweight and easy to store, making them a great option for backpacking trips. They’re also easy to prepare, usually just requiring hot water to rehydrate the food.

Another option is trail mix. Trail mix is a great snack option for outdoor adventures because it’s lightweight, easy to store, and provides a good mix of nutrients. You can make your trail mix with nuts, seeds, dried fruit, and other healthy ingredients, or you can buy pre-made mixes at the store.

No matter what type of nutrient survival food you choose, it’s important to make sure you have enough on hand for your needs. Keep in mind the number of people you’ll be feeding and how long you’ll need the food to last. With the right nutrient survival food, you can stay healthy and fueled no matter what situation you find yourself in.

Comparing Brands

When it comes to nutrient survival food, several brands on the market offer a variety of options. Here is a comparison of some of the most popular brands to help you make an informed decision.

Mountain House

Mountain House is a well-known brand that offers freeze-dried meals in pouches. They have a wide variety of options, from breakfast to dinner, and even desserts. Their meals have a long shelf life and are easy to prepare – add hot water and wait a few minutes. They also offer gluten-free and vegetarian options.

Augason Farms

Augason Farms offers a range of freeze-dried and dehydrated meals, as well as bulk ingredients for cooking your meals. Their meals are packaged in cans and have a long shelf life. They also offer gluten-free and vegetarian options. Augason Farms is a good option to stock up on long-term survival food.

Wise Company

Wise Company offers freeze-dried meals in pouches and emergency food kits. Their meals have a long shelf life and are easy to prepare – add hot water and wait a few minutes. They also offer gluten-free and vegetarian options. Wise Company is a good option to prepare for emergencies or disasters.

Legacy Food Storage

Legacy Food Storage offers freeze-dried meals in pouches, emergency food kits, and bulk ingredients. Their meals have a long shelf life and are easy to prepare – just add hot water and wait a few minutes.

They also offer gluten-free and vegetarian options. Legacy Food Storage is a good option to stock up on long-term survival food.

Each brand has its unique offerings and it’s important to consider your specific needs when choosing a brand. Whether you’re looking for a short-term solution or long-term survival food, there’s a brand out there that can meet your needs.

Customer Reviews and Testimonials

Looking for a reliable source of survival food can be a daunting task, but don’t just take our word for it, here are some reviews and testimonials from satisfied customers.

  • “I recently purchased the Nutrient Survival Food kit and was blown away by the quality and taste of the food. It’s amazing to know that I have a reliable source of nutrition in case of an emergency. I highly recommend this product to anyone looking for a trustworthy survival food option.” – John D.

  • “I’ve tried a few different brands of survival food in the past and was always disappointed with the taste and quality. However, after trying Nutrient Survival Food, I was pleasantly surprised. The food is delicious and packed with nutrients. It’s worth the investment.” – Sarah K.

  • “I purchased the Nutrient Survival Food kit for my family and we were all impressed with the taste and variety of the food. It’s reassuring to know that we have a reliable source of nutrition in case of an emergency. I highly recommend this product to anyone looking for a high-quality survival food option.” – Mark T.

  • “I was skeptical about purchasing survival food, but after trying Nutrient Survival Food, I am a believer. The food is not only nutritious but also delicious. It’s a great investment for anyone looking to be prepared for any emergency.” – Emily S.

As you can see, Nutrient Survival Food has received positive reviews from satisfied customers who appreciate the quality and taste of the food. Don’t wait until it’s too late, invest in Nutrient Survival Food today and be prepared for any emergency.

Purchasing Options and Considerations

When purchasing nutrient survival food, there are a few things you should consider to ensure you get the best value for your money. Here are some tips to help you make an informed decision.

1. Types of Nutrient Survival Food

There are different types of nutrient survival food available in the market, including freeze-dried, dehydrated, and canned food. Each type has its advantages and disadvantages, so it’s important to choose the one that best suits your needs.

2. Shelf Life

One of the most important factors to consider when purchasing nutrient survival food is its shelf life. Check the expiration date before buying and choose options with a longer shelf life to ensure you have enough time to consume them.

3. Nutritional Value

Another important consideration is the nutritional value of the food. Look for options that provide a balanced mix of macronutrients (carbohydrates, protein, and fat) and micronutrients (vitamins and minerals) to ensure you get the nutrients you need to stay healthy.

4. Cost

Nutrient-Survival Food consider cost to fit budget

While cost should not be the only factor to consider, it’s important to choose options that fit within your budget. Compare prices from different brands and suppliers to find the best deals without compromising on quality.

5. Brand Reputation

Lastly, consider the reputation of the brand and supplier before making a purchase. Look for reviews and feedback from other customers to ensure a reliable and trustworthy product.

By considering these factors, you can make an informed decision when purchasing nutrient-survival food and ensure you have a reliable source of nutrition in an emergency.

Frequently Asked Questions about Nutrient-Survival Food

What are the top-rated options for survival food in terms of nutrition?

When it comes to nutrient survival food, there are several options available in the market. The top-rated options include freeze-dried fruits and vegetables, whole grains, and protein-rich meats like beef, chicken, and fish. These foods are packed with essential vitamins and minerals that your body needs to stay healthy and energized.

Where can I purchase survival food that’s packed with nutrients?

You can purchase nutrient-packed survival food from various online retailers and specialty stores. Some popular options include Amazon, REI, and Wise Company. Make sure to read reviews and compare prices before making a purchase.

How does freeze-dried survival food compare to regular options?

Freeze-dried survival food is a popular option among preppers because it has a longer shelf life and is lightweight and easy to store. It also retains more nutrients compared to regular options because it is dried at a low temperature, which helps preserve the food’s nutritional value.

Are there any free samples available for nutrient-dense survival food?

Some companies offer free samples of their nutrient-dense survival food products. However, these samples are usually limited in quantity and may not be available. Check with the manufacturer or retailer to see if they offer any free samples.

Who is behind the production of these nutrient-packed survival meals?

Several companies produce nutrient-packed survival meals, including Wise Company, Mountain House, and Legacy Food Storage. These companies have a team of experts who carefully select and prepare the ingredients to ensure that the meals are both nutritious and delicious.

What should I look for when stockpiling food for emergencies?

When stockpiling food for emergencies, it’s important to look for nutrient-dense options with a long shelf life. You should also consider the number of servings, calorie count, and dietary restrictions. Store the food in a cool, dry place and rotate your stock regularly to ensure it stays fresh.

Five Ways to Survive a Harrowing Attack: How to Win the Fight

It’s a sad reality that in today’s world, it is more likely than not that you will be attacked at some point.

Five Ways to Survive a Harrowing Attack Cover Image

The increase in violent crimes has led to a rise in the number of self-defense courses and weapons training programs available for those who are looking to increase their survival rate.

Five Ways to Increase Your Survival in an Attack

In this blog post, we share five ways to survive a harrowing attack.

1. Stay Out of Sight

By not drawing any attention to yourself, you’ll be much less likely to be attacked. If you can’t find an escape route, try to stay in a place where it would be difficult for the attacker to corner you.

One of the best ways to survive a harrowing attack is by creating distance between yourself and the attacker. If possible, run away from them!

Sometimes fight isn’t worth it so try and leave the area before things escalate too much. It may seem like a cowardly escape, but it’s better than risking your life and other people’s lives in the process.

Don’t be afraid to run away if you have no chance of winning!

If you can’t create enough distance for a safe escape, give a warning to others nearby so they know what’s happening too. A scream may help alert bystanders that something isn’t right near them!

Screeching tires might also provide some notice if there aren’t any people around! It doesn’t hurt to try anything when it comes down to life and death.

2. Don’t Fight Unless You Have To

Most people aren’t trained soldiers. It won’t do them any good to try and fight unless they’re going to die if they don’t. Fighting will only draw more attention to the situation.

It is important not to fight back with an attacker unless necessary. If they are going to kill you or severely harm you without any restraint from law enforcement then fighting might be the only way out.

However, if there’s the slightest possibility of someone coming over for help before anything dire happens then don’t engage them at all costs because chances are that somebody will come by eventually and save you during those moments where self-defense would increase your survival against a traumatic attack on an individual who lacks training as well as experience in hand to hand combat.

3. Get a Sense of Where You Are

You should be able to recognize whether you’re in enemy-occupied territory, whether you’re in danger or not, etc.

Ways To Survive A Harrowing Attack be aware of your surroundings

You should always be aware of your surroundings.

Sometimes, you can increase your chances of survival by checking to see if the area is safe or not before even approaching it.

If there’s any indication that something doesn’t look right then don’t enter! In this situation, one wrong move could cost an individual their life and increase the likelihood of being attacked in a vicious assault on them without warning.

A good tip to help increase survival chances when walking through dark areas or in open spaces is: if you see or hear people arguing, cross over to a different side and avoid getting involved at all costs.

If there’s a possible threat from someone else nearby who may want to harm then it would be better not to engage them while they’re still coming towards you. Confrontation will only increase their desire for violence against others as well as increase the likelihood of being attacked while there’s still time to escape.

4. Ganging Up on an Attacker

If you are forced to fight, 5 people charging one person at once will usually win, even if the one person is armed. Ganging up gives everyone a better chance of success.

The attacker will have fewer people to deal with and increase the likelihood of winning if they don’t know who is attacking them from all different directions!

5. Anything Can Be a Weapon

Think about all of the things around you that you could use as weapons in the event of a sudden terrorist attack. Surprisingly, you’ll notice that you’re fairly well-armed at any moment with things like chairs, glass bottles, kitchen knives, etc.

Ways To Survive A Harrowing Attack sticks and rocks can be used as weapons

You can increase your chances of survival by using more than fists or weapons – use whatever it takes to get away alive! Grab rocks, sticks, and anything that can serve as a weapon against an assailant during dangerous times since every ounce counts when it comes to life and death.

Don’t let fear stop you either because without courage there’s nothing left once an individual has lost their way completely under such circumstances.

Knowledge Equals Power

The best thing someone can do to increase their chances of survival in a harrowing attack is to enhance their knowledge.

Knowledge and awareness are important when it comes down to an individual’s safety. With the right information, someone can increase their chances of surviving against any threat that may come up during this difficult time!

There’s no need to be afraid or hesitate if you know what steps to take next – even though some things might seem too hard at first glance with practice, they’ll become easier over time until eventually, those techniques will become second nature: just like how riding a bike once seemed impossible but now seems normal after all these years…

Think about all of the things around you that you could use as weapons in the event of a sudden terrorist attack. Surprisingly, you’ll notice that you’re fairly well-armed at any moment with things like chairs, glass bottles, kitchen knives, etc.

You can increase your chances of survival by using more than fists or weapons – use whatever it takes to get away alive! Grab rocks, sticks, and anything that can serve as a weapon against an assailant during dangerous times since every ounce counts when it comes to life and death.

Final Thoughts on Five Ways to Survive A Harrowing Attack

Don’t let fear stop you either because without courage there’s nothing left once an individual has lost their way completely under such circumstances.

Ways To Survive A Harrowing Attack do not let fear stop you

The scale will tip back into balance eventually but until then we must do everything possible to increase our chances with these ways to survive a harrowing attack.

Off-Grid Wind Power Systems: Harnessing Sustainable Energy in Remote Locations

Living off the grid offers a unique blend of independence and sustainability, and tapping into wind power is an increasingly popular way for you to generate your electricity. Off-grid wind power systems harness the natural energy of the wind to produce electrical power for homes, farms, and even entire communities that are situated away from traditional power grids. By implementing your wind turbine system, you are taking a step towards energy autonomy and reducing your environmental footprint.

Off-Grid Wind Power Systems Cover Image

Choosing the right wind power setup for your needs involves understanding the various components that make up a small wind electric system, such as turbines, batteries, and power management devices.

You can use these systems alone or with other renewable energy sources like solar to create a hybrid system, enhancing reliability and efficiency.

Advancements in technology and design mean that modern wind turbines are more accessible and easier to maintain than ever before.

Whether aiming to completely disconnect from the utility grid or want to offset your energy consumption, off-grid wind systems offer a versatile and eco-friendly solution to meet your energy needs.

Understanding Wind Power

Harnessing wind energy is a sustainable approach to meeting your electricity needs. Let’s explore the concepts that shape wind power systems and their ecological and economic advantages.

Principles of Wind Energy

Wind energy operates on a simple principle: wind turns the blades of a wind turbine, which drives a generator to produce electricity. The efficiency of your system depends on several factors, most notably wind speed and the turbine’s design.

For example, the more wind through a turbine’s rotor, the more electricity it generates.

Wind patterns are vital to the placement and operation of turbines. By monitoring wind speed and direction, you can adjust the turbine’s orientation and height to maximize energy yield.

Remember, as wind speed increases, the power output exponentially increases due to the cubic relationship between wind speed and power.

Benefits of Wind Power

Wind power presents a sustainable and renewable energy solution that offers several benefits.

Off-Grid Wind Power Systems avoid high electric bills
  • Reduces Carbon Footprint: Wind turbines generate clean energy; they do not produce greenhouse gases during operation.
  • Lower Energy Costs: By generating your electricity, you avoid the costs associated with purchasing power from the grid and are less susceptible to fluctuations in energy prices.
  • Energy Independence: An off-grid wind energy system allows you to produce your power, giving you autonomy from utility services and an uninterrupted power supply, even during grid failures.
  • Flexibility and Scalability: Wind power systems can range from small, portable units to large-scale installations, making them adaptable to a wide variety of settings and demands.

When considering wind power, thoroughly assess your site’s wind resources and consult with professionals to optimize the turbine’s performance for a more resilient and sustainable energy future.

Off-Grid System Basics

When you decide to adopt an off-grid lifestyle with wind power, it’s essential to understand the key components that make up the system and how it differs from a traditional on-grid setup.

Components of an Off-Grid Wind System

Your off-grid wind system primarily consists of the following.

  • Wind Turbines: These capture wind energy and convert it to electricity.
  • Tower: Raises the turbine to capture more wind.
  • Charge Controllers: Regulate the power of the batteries to prevent overcharging.
  • Batteries: Store the electricity for use when there is no wind.
  • Inverters: Convert the stored DC power from your batteries to AC power for household use.
  • Disconnect Switches: Allow you to disconnect the system for maintenance.

Each component plays a vital role in ensuring the system runs efficiently. For example, the taller the tower, the more access the wind turbine has to less turbulent and potentially stronger winds.

Appropriate battery storage is vital to maintaining power when the wind isn’t blowing, and inverters are essential for converting the power to a usable form.

Off-Grid vs On-Grid Systems

Off-Grid Wind Power Systems power grid
  • Off-grid systems do not connect to the public power grid.
    • Benefits include independence from utility companies and the capability to provide power in remote locations.
    • Requires careful planning of energy use and a larger initial investment in components like batteries.
  • On-grid systems, also known as grid-tied systems, connect to the public power grid.
    • Can sell excess power back to the grid in many places.
    • Are typically less expensive to install due to no need for battery systems.
    • Rely on the grid for backup power instead of batteries.

Deciding between an off-grid or an on-grid system depends on your location, energy needs, and desire for energy independence. Off-grid systems give you full control over your energy supply but require a commitment to managing your energy resources effectively.

Planning and Design

When planning and designing an off-grid wind power system, the focus should be on accurately assessing your site, properly sizing the system, and selecting appropriate energy storage options to ensure a reliable power supply.

Site Assessment

Your optimal site assessment involves understanding wind resources, local zoning requirements, and site accessibility. An effective way to begin is by conducting a wind resource assessment using data from local weather stations or small anemometers.

Also, check on the local zoning laws to ensure wind turbine installations are permitted and identify any height restrictions that might apply.

System Sizing

System sizing directly impacts the efficiency and cost-effectiveness of your wind power system. Calculate your average energy consumption and consider future power needs to determine the correct turbine size.

For homes or farms, a small-scale turbine typically ranging from 2 kW to 10 kW could suffice, while larger communities might need a multi-turbine setup.

Energy Storage Options

Your system’s reliability hinges on suitable energy storage options to manage variability in wind speed and energy demand. Batteries are a common solution, with lithium-ion and lead-acid batteries being the most prevalent.

For sustained energy supply, consider the battery’s capacity (measured in kWh), depth of discharge (DoD), and cycle life. Additionally, hybrid systems that incorporate solar panels can provide a more consistent energy supply and reduce the overall storage demands.

Wind Turbine Selection

When choosing a wind turbine, your focus should be on matching the type and specifications of the turbine to the specific performance needs of your off-grid power system.

Types of Wind Turbines

There are primarily two types of wind turbines for off-grid use: horizontal-axis wind turbines (HAWTs), which are the most common, and vertical-axis wind turbines (VAWTs). HAWTs resemble traditional windmill structures, with blades that spin around a horizontal axis, making them efficient in steady wind conditions.

On the other hand, VAWTs, with their main rotor shaft arranged vertically, are less sensitive to wind direction and can be more suited for areas with variable wind conditions.

Turbine Specifications

  • Rated Power Output: This indicates the maximum power the turbine can produce at a specific wind speed. It’s usually measured in kilowatts (kW).
  • Cut-in Speed: The minimum wind speed at which the turbine starts generating power.
  • Cut-out Speed: The wind speed at which the turbine stops operating to prevent damage.
  • Rotor Diameter: Impacts how much wind the turbine can capture; wider diameters mean more power but require more space.

Your goal is to find a balance between maximum energy generation and physical space you have available, as well as the local wind conditions.

Performance Considerations

  • Efficiency: Look for turbines with a high conversion rate of wind to electrical energy.
  • Durability: Durability under various weather conditions ensures a long service life.
  • Noise Level: Important if your installation is close to living areas.
  • Maintenance: Consider how often the turbine will need maintenance and the associated costs.

Make your decision based on how these performance factors will affect your energy supply and overall satisfaction with the wind power system.

Energy Storage Solutions

In off-grid wind power systems, energy storage is a crucial component that ensures a reliable power supply even when wind production is inconsistent. Let’s examine the two core elements that make up this stable energy storage setup.

Battery Technology

For an off-grid system, selecting the right type of battery technology is critical. Currently, lead-acid batteries are widely used due to their cost-effectiveness and availability.

However, newer technologies like lithium-ion are gaining traction because they offer a higher energy density and longer lifespan with a 10 MWh flow battery energy storage system being an innovative example. This means you can store more energy in a smaller space, and they require less frequent replacement.

  • Lead-Acid: Affordable, widely available.
  • Lithium-Ion: Higher energy density, longer lifespan.

Battery Management Systems

A robust Battery Management System (BMS) is essential for protecting your batteries and extending their life. The BMS monitors battery voltage, current, temperature, and state of charge, intervening to prevent overcharging and deep discharging.

Off-grid energy storage technologies largely depend on BMSs to optimize performance and ensure safety. An investment in a quality BMS translates into better battery health and more efficient energy storage.

  • Monitors and regulates battery functions.
  • Prevents overcharging/deep discharging.
  • Prolonged battery life and improves safety.

Installation and Maintenance

Proper installation and rigorous maintenance are pivotal for the longevity and efficiency of your off-grid wind power system.

Installation Process

To set up your small wind electric system, ensure you have a suitable site that meets wind resource requirements. Have a professional perform a site analysis and conduct wind measurements.

Then select a wind turbine that fits your energy needs and prepare the site’s foundation. The erection of the wind turbine tower, which includes safety checks and electrical connections, should strictly adhere to manufacturer guidelines and local codes.

For detailed guidance, the U.S. Department of Energy offers resources on installation.

Maintenance and Upkeep

Once installed, annual maintenance is crucial to ensure the longevity of your wind system, which includes inspection of bolts and electrical connections, lubrication of moving parts, and checking for corrosion.

Off-Grid Wind Power Systems inspections are needed every few years

Every few years, it may be necessary to perform a more in-depth check-up, like replacing the brake pads and assessing the tower’s integrity. Proper upkeep will help the system last 20 years or longer, according to studies.

For an overview of maintenance activities, consider resources from Practical Off-Grid Living.

Regulations and Policies

When you decide to install an off-grid wind power system, it’s essential to understand and comply with various regulations and policies that apply to your project.

Zoning and Permitting

Your local zoning ordinances dictate where and how wind turbines can be installed. You must obtain the necessary permits, which can include building, electrical, and other types of permits, depending on your locale.

For instance, the Public Utility Regulatory Policies Act of 1978 (PURPA) requires utilities to connect with and purchase power from small wind energy systems, impacting your installation and grid interconnection processes.

Incentives and Subsidies

Financial incentives can significantly offset the cost of your wind system. These may involve tax credits, rebates, and grants.

As an example, recently, the Inflation Reduction Act passed by Congress extended tax credits for small wind energy systems.

Explore the DSIRE database for a comprehensive list of federal and state renewable energy policies and incentives that might apply to your wind project.

Environmental Impact

When considering off-grid wind power systems, it’s essential to evaluate how they interact with the environment.

This includes biological and social considerations, such as their effects on wildlife and the perception by local communities.

Wildlife Considerations

Wind turbines can affect local wildlife primarily through habitat disruption and collision risks. Birds and bats, for instance, may collide with turbine blades, which can result in fatalities.

Off-Grid Wind Power Systems wind turbines can affect local wildlife

Research by the National Wind Coordinating Committee has found that these impacts are relatively low and are not a significant threat when compared to other human-related causes of bird and bat mortality.

Likewise, changes in air pressure caused by spinning turbines may also affect flying fauna. However, the NWCC indicates these issues do not pose a threat of significant scale.

Noise and Aesthetics

Wind turbines produce a characteristic swishing or whooshing sound, which varies in volume depending on wind speed and turbine design. In small-scale off-grid systems, noise can be minimized through careful site selection and technology choices.

The aesthetic impact includes visual changes in the landscape, which can be a point of contention for nearby residents. Sensitivity to these impacts varies among different communities and individuals, with some considering the turbines an industrial blight, while others see them as symbols of clean energy progress.

Economic Considerations

When investing in off-grid wind power systems, your focus should be on the initial costs as well as the potential for long-term savings. These key factors will inform your decision-making process.

Cost-Benefit Analysis

Off-grid wind power systems require a substantial upfront investment. The total installation costs can range from $20,000 to over $100,000. This initial investment cost considers the wind turbine, tower, electrical components, and installation labor.

Your costs will vary depending on system size and location. To evaluate if it is a sound investment, you must compare these initial costs against the expected energy output and lifespan of the system.

Equipment Costs

  • Wind turbine
  • Tower and foundation
  • Electrical components
  • Battery storage (if applicable)

Installation Costs

  • Labor
    • Site preparation
    • Connectivity to your property

Long-Term Savings

The benefits of off-grid wind systems unfold over time. Once the system is operational, you can expect significant reductions in your electricity bills.

Moreover, the economic benefit of incorporating a battery system is the ability to store excess energy, optimizing your wind power utilization. With proper maintenance, wind turbines can last around 20 years, contributing to substantial financial savings in the long term.

Savings on Electricity Bills

  • Independent from grid electricity price increases
  • No ongoing utility costs

System Lifespan

  • Approximately 20 years with maintenance

Additional Financial Benefits

  • Possible incentives and subsidies
    • Increased property value

Technological Advances

In the fast-evolving landscape of off-grid wind power systems, you can witness significant enhancements in efficiency, cost, and integration capabilities. Let’s focus on what these tech progressions mean for you.

Innovations in Wind Power

Performance and Reliability: The latest wind turbine technology has improved performance metrics substantially. Your system can benefit from a higher average capacity factor, which could reach beyond the older standard of 22% for wind turbines. This increase in performance means more consistent and reliable energy generation for your off-grid setup.

Cost Reduction: Efforts in research and development have successfully reduced the costs associated with off-grid wind energy systems. By employing next-generation technologies, your investment in wind power is becoming increasingly economical.

Emerging Technologies

Magnetic Levitation (MagLev) Turbines: A fascinating advancement is the use of MagLev turbines. These turbines essentially float the blades to eliminate friction, offering low-power operation advantages, though they do currently come with a higher cost and lower efficiency.

Large Offshore Wind Farms: For those considering large-scale applications, emerging tech includes extensive control systems and power integration methods that facilitate the growth of massive offshore wind farms. While more complex, the tech promises higher power generation and stability.

By staying informed about these technologies, you can make more knowledgeable decisions about your off-grid wind power investments.

Frequently Asked Questions about Off-Grid Wind Power Systems

In this section, you’ll find concise answers to common queries about implementing and using off-grid wind power systems for your home.

How can I determine the appropriate size for a wind turbine to power my home?

The size of a wind turbine you need depends on your energy consumption and local wind resources. Consulting with a wind energy expert is essential for conducting a site assessment to calculate your energy needs.

What are the best practices for setting up a small-scale wind turbine for residential use?

For optimal performance and safety, ensure your wind turbine is placed in an area with no obstructions and meets local zoning, permitting, and utility requirements. Regular maintenance and selecting quality components are also best practices.

Are there any American manufacturers that specialize in home wind power systems?

Yes, there are American companies producing wind turbines suitable for residential use. Researching and reaching out to domestic manufacturers can help you find a local option that meets your renewable energy goals.

What are the key components of a complete off-grid wind power system?

A complete system includes a wind turbine, tower, charge controller, battery bank, inverter, and often, a backup generator. Each component should be sized correctly for your specific energy requirements.

Can you combine solar and wind power systems for off-grid living?

Combining solar panels with a wind turbine can provide a more consistent power supply. An integrated system needs a hybrid inverter and a properly sized battery bank to manage the power from both sources.

What are the typical costs associated with installing an off-grid wind turbine?

Costs vary greatly based on turbine size, tower height, and installation complexity. Generally, small residential turbines can range from a few thousand dollars to over $20,000, not including potential ongoing maintenance costs.

Best Battery for Off-Grid Living: Your Ultimate Power Solution

Choosing the best battery for off-grid systems ensures reliable power when needed. Battery selection becomes pivotal as you transition to a life less dependent on the utility grid or design a backup power system to weather outages. Off-grid batteries come in various technologies and capacities, each with pros and cons. When considering your options, it’s essential to weigh factors like longevity, capacity, maintenance requirements, and cost.

Best Battery for Off-Grid Cover Image

Modern battery technologies have evolved, offering high efficiency and longer life spans. Lithium-ion batteries, for example, provide a higher energy density, allowing for a compact size while delivering consistent power output.

They require less maintenance than their lead-acid counterparts and can handle more charge/discharge cycles, making them a popular choice for off-grid living. However, it’s important to be aware that the upfront cost might be higher compared to traditional batteries.

Different off-grid scenarios might call for different battery solutions. While a robust lithium battery could be ideal for long-term efficiency, some situations might benefit from the initially lower-cost lead-acid batteries, especially if budget constraints are a significant consideration.

Ultimately, your specific energy needs and goals will guide you to the best battery solution for your off-grid setup.

Understanding Off-Grid Energy Needs

When living off-grid, it’s crucial to have a reliable power system tailored to your specific energy needs. Careful consideration of energy consumption and reserve capacity ensures a consistent and adequate power supply.

Assessing Energy Consumption

Begin by listing all electrical devices you intend to use, including their wattage and hours of operation per day.

Best Battery for Off-Grid compute the wattage
  • LED Lights: 10 watts, 5 hours/day
  • Refrigerator: 150 watts, 24 hours/day
  • Water Pump: 200 watts, 1 hour/day

Next, calculate the daily energy consumption using the formula:
(Wattage) x (Hours of Operation) = Daily Watt-hours.

This will give you a clear understanding of your total daily energy demand in watt-hours (Wh).

Calculating Energy Reserves

Determine your energy reserve needs by considering the number of days of autonomy—the period your system can operate without solar input due to weather conditions.

For example, if you require three days of autonomy and your daily consumption is 2 kilowatt-hours (kWh), your battery bank should have at least:

  • 2 kWh/day x 3 days = 6 kWh total capacity

Remember that batteries should not be completely discharged to maintain their longevity. It is generally recommended to keep the depth of discharge (DoD) at a healthy level (usually around 20-50% for most batteries).

Adjust battery capacity accordingly to ensure you have the necessary reserves without causing undue stress on the system.

Types of Batteries for Off-Grid Systems

Choosing the right type of battery is crucial for your off-grid power system’s efficiency and longevity. Each battery technology comes with its unique set of characteristics suitable for specific needs and applications.

Lead-Acid Batteries

Traditionally, lead-acid batteries have been a popular choice for off-grid systems due to their affordability and availability. They come in two main types: flooded lead-acid (FLA) and valve-regulated lead-acid (VRLA), which include gel and absorbed glass mat (AGM) batteries.

FLA batteries require regular maintenance, including water top-ups, but are known for their long lifespan if properly maintained. Conversely, VRLA batteries are maintenance-free but usually have a shorter lifespan and higher cost compared to FLA.

Lithium-Ion Batteries

Lithium-ion batteries are favored for their higher energy density, lighter weight, and longer cycle life compared to lead-acid. They can typically discharge more stored energy (DoD, Depth of Discharge) without harming their lifespan.

A particular type, lithium iron phosphate (LiFePO4 or LFP), is increasingly used in off-grid setups due to its safety and stability. Despite the higher upfront costs, their longevity and performance can make them a cost-effective solution.

Nickel-Iron Batteries

Less common but notable, nickel-iron batteries offer a very long lifespan, often exceeding 20 years. They can withstand deep discharges, are relatively immune to damage from overcharging, and are non-toxic, making them an environmentally friendly option.

However, they have a lower energy density, are larger and heavier, and have a higher initial cost than other battery types.

Saltwater Batteries

Emerging as an eco-friendly alternative, saltwater batteries use a saltwater electrolyte to store energy. They are free of heavy metals, making them non-toxic and safe to handle.

Best Battery for Off-Grid saltwater battery
Photo Credit:

While their energy density is lower than lithium or lead-acid batteries, they offer the advantages of being recyclable and not prone to thermal runaway. Saltwater batteries are suitable for homeowners looking for a sustainable and safe storage solution.

Battery Capacity and Power Rating

When planning for off-grid living, it’s crucial to select batteries with sufficient capacity and power rating to meet your energy demands.

Understanding Amp-Hours

Amp-Hours (Ah) measure your battery’s electric charge storage capacity. The higher the Ah rating, the more energy a battery can store.

For instance, if your off-grid setup requires 50 Ah per day, a battery with a 100 Ah rating could theoretically last two days under ideal conditions.

Depth of Discharge and Cycle Life

The Depth of Discharge (DoD) indicates the percentage of the battery that has been discharged relative to its overall capacity. A battery’s cycle life is directly affected by how deeply it is discharged regularly.

Consistently discharging only 20% can extend your battery’s life, but utilizing 80% of its capacity will provide more usable energy before needing a recharge. It’s a balance between longevity and practicality.

Charging Your Batteries

When setting up an off-grid battery system, understanding how to charge your batteries effectively is critical for maintaining power availability and extending the life of your battery system.

Solar Charge Controllers

Your off-grid solar system needs a solar charge controller to regulate the voltage and current from your solar panels. It ensures that your batteries are charged efficiently and safely.

For example, Maximum Power Point Tracking (MPPT) controllers optimize the power output from solar panels by adjusting the electrical operating point.

Meanwhile, Pulse Width Modulation (PWM) controllers are more cost-effective and are suitable when the panel voltage is similar to the battery voltage.

Wind and Hydro Power Options

If your site has access to wind or running water, wind turbines or hydroelectric systems can be an excellent complement to solar charging. These systems can generate power around the clock, depending on environmental conditions. It’s important to use charge controllers that can handle the variable input from these sources.

Diversion load controllers, for example, redirect excess energy to prevent overcharging, while hybrid controllers can manage power from solar and wind/hydro sources.

Remember to match your charging sources and controllers with your battery specifications for optimal performance and longevity.

Maintenance and Safety

Maintaining the integrity of your off-grid system is crucial, and performing regular maintenance while observing strict safety procedures can significantly prolong the lifespan of your batteries and keep you safe.

Proper Battery Maintenance

Best Battery for Off-Grid keep battery clean
  • Regular Inspection: You should visually inspect your batteries periodically for any signs of damage or wear, such as cracks or corrosion.
  • Cleanliness: Keep the battery area clean and dry to prevent unwanted conductive paths or corrosion.
  • Voltage Checks: Check the voltage levels to ensure your batteries are charging and discharging within their specified ranges.
  • Connections: Tighten any loose connections and look for any signs of overheating or wear.

Safety Procedures and Equipment

  • Personal Protective Equipment (PPE): Always wear safety glasses and gloves when handling batteries to protect against acid spills and short circuits.
  • Proper Ventilation: Ensure batteries, especially lead-acid types, are in a well-ventilated area to dissipate harmful gases produced during charging.
  • Correct Handling: Lift heavy batteries using proper techniques or aids to prevent injury. Avoid direct contact with the battery contents.
  • Emergency Plan: Have an emergency plan in place which includes a fire extinguisher rated for electrical fires and knowledge of first-aid procedures in case of acid spills or other accidents.

System Integration and Compatibility

When setting up an off-grid battery system, it’s crucial to ensure that all components work harmoniously. Your inverter must match the voltage and capacity of your batteries, and the battery management system (BMS) should be compatible to monitor and protect your investment effectively.

Inverter Selection

Your choice of inverter plays a pivotal role in the overall efficiency of your off-grid power system. Select an inverter that aligns with your battery’s voltage and has the necessary wattage capacity to handle your energy needs.

For instance, with lithium-ion batteries, you’ll need an inverter that can manage high charge/discharge rates for optimal functionality.

Battery Management Systems

A Battery Management System (BMS) is essential for safeguarding your battery storage. It ensures cells are balanced, prevents overcharging, and monitors temperature to prolong battery life.

For example, integrating a BMS with a Battle Born Battery allows for detailed monitoring and maximizes the lifespan of the unit.

Environmental Considerations

When considering the best battery for off-grid living, your environmental impact is significant. You’ll need to weigh the sustainability and ability to recycle the battery against its climate impact and adaptability.

Sustainability and Recycling

Sustainability is at the core of choosing an off-grid battery. You want a battery that not only serves your energy needs but also contributes minimally to environmental degradation.

Lithium iron phosphate (LiFePO4) batteries are a popular choice for their longer lifespan and lower risk of pollution when disposed of. When looking at battery options, check for a battery management system (BMS) that ensures proper charging and discharging, extending the battery life and thus its sustainability.

Recycling is another crucial environmental consideration. Batteries contain valuable materials that can and should be reclaimed at the end of their life cycle. Lead-acid batteries, for example, have a well-established recycling process.

However, recycling rates and facilities for other types, like lithium and nickel-based batteries, are evolving. Ensure you choose a battery with a feasible end-of-life recycling plan.

Climate Impact and Adaptation

The climate impact of your off-grid battery encompasses its carbon footprint during production, operation, and disposal. Batteries such as nickel-iron have a lower energy density but boast a long lifespan and a less intensive manufacturing process, which can result in a lower overall climate impact. It’s essential to consider the full lifecycle emissions of your battery choice.

Moreover, batteries must be adaptable to various environmental conditions. High temperatures can affect charging and reduce longevity, while cold conditions can lower discharge capacity.

Your off-grid system must include batteries capable of adapting to your specific climate challenges to ensure efficiency and durability.

For precise climate impact data and information on how different batteries adapt to environmental conditions, check detailed guides like Mother Earth News.

Budgeting and Costs

When selecting the best battery for your off-grid system, understanding the costs involved is crucial.

Best Battery for Off-Grid understand the costs

Your choice will impact both immediate financial outlay and potential future savings.

Initial Investment

The upfront cost of batteries for off-grid living varies widely based on technology. Lead-acid batteries are a traditional, less expensive option, but they typically have a shorter lifespan and require more maintenance.

On the other hand, lithium batteries represent a more significant initial investment but offer longer lifespans and better efficiency.

  • Lead-acid batteries: Lower purchase price, frequent maintenance
  • Lithium-ion batteries: Higher purchase price, lower maintenance, longer life cycle

Long-Term Savings

Investing in a high-quality battery may result in long-term savings despite the higher initial costs. Technologies such as lithium iron phosphate (LiFePO4) batteries have a higher upfront cost but can offer greater efficiency and longer life cycles, reducing the frequency and cost of replacements.

  • Lead-acid batteries: Larger number over time, higher long-term cost
  • Lithium-ion batteries: Fewer replacements, more savings over time

Evaluating the balance between these initial and long-term costs will help you make the most cost-effective decision for your off-grid power needs.

Warranties and Lifespan

When considering the best battery for off-grid use, it’s crucial to understand the terms of the warranty and to have realistic expectations regarding the lifespan of the battery, as these will greatly impact your long-term satisfaction and investment.

Understanding Warranties

Before purchasing a battery for off-grid usage, you should thoroughly examine the warranty offered by the manufacturer. Most battery warranties will detail the number of cycles or the duration of coverage, typically in years.

A cycle refers to one full discharge followed by a full recharge of the battery. Some manufacturers, like LiTime, offer significant numbers of discharge cycles that can range up to 4,000 – 15,000.

Warranties might also specify conditions for coverage, so it’s important to ensure that your intended use complies with these terms to avoid voiding the warranty.

Predicting Battery Lifespan

The lifespan of a battery is often expressed in cycles, with lithium-ion batteries typically providing a longer functional life.

For example, LFP batteries are known for their efficiency and longevity, which can be particularly beneficial for off-grid living. Lifespan also depends on factors such as depth of discharge (DoD), temperature, and how the battery is maintained.

When selecting a battery, compare the number of cycles it can handle and look for those with higher numbers, which indicate a potentially longer lifespan.

Remember, a longer warranty and higher cycle count can be indicative of a manufacturer’s confidence in the endurance and quality of their battery.

Case Studies

In exploring how batteries perform in actual off-grid environments, we’ll look into detailed examples from residential and commercial spheres. These real-world applications demonstrate the reliability and efficacy of different battery technologies in off-grid settings.

Residential Off-Grid Success Stories

Alaska, U.S. – Off-Grid Home Solutions: In Alaska’s remote regions, homeowners often rely on batteries for power. One case involves a lithium-nickel-cobalt-aluminum battery system that provides stability even under harsh conditions.

This solution allows energy security without the constant need for fuel deliveries, a common challenge in these areas. Further details on the implementation can be found here.

RV and Off-Grid Lifestyle Communities: Batteries designed for the RV and off-grid communities, like those by LiTime, are rated for 4,000 – 15,000 discharge cycles, showcasing longevity and cost-efficiency.

At under $300 for a 12V 100Ah LiFePO4 lithium battery, they’re a financially viable option for individuals striving for self-sufficiency. More information on these systems can be accessed here.

Commercial Off-Grid Applications

Generac Power Systems in Off-Grid Areas: Generac has been pivotal in providing battery energy storage systems (BESS) for a variety of off-grid commercial operations.

BESS are critical in power generation, load management, and ensuring a consistent energy supply where traditional grid power is absent or unreliable. Detailed insights into these applications are available here.

Off-Grid School Lighting Project – Angola: An educational institution in Angola benefited from an off-grid lighting project using solar PV coupled with lithium-nickel-cobalt-aluminium batteries, provided by AllCell.

This implementation not only granted the school access to reliable lighting but also demonstrated the practicality of combining solar energy with advanced battery technology in educational settings. The case study is outlined here.

Frequently Asked Questions about the Best Battery for Off-Grid

When considering off-grid living, selecting the right batteries for your solar power system is crucial. Here, you’ll find answers to common questions that will help you make informed decisions.

What are the top battery options for solar power storage systems?

For solar power storage, the best options are typically lithium-ion and LiFePO4 batteries. These batteries offer fast charging, high performance, and long life spans.

How do I calculate the required battery bank size for living off-grid?

To calculate the size of your battery bank, you’ll need to determine your daily energy usage in kilowatt-hours and design your system based on the amount of electricity you need to store for reliable, continual use.

What factors should I consider when selecting batteries for an off-grid solar system?

Considerations include the battery’s type, capacity, cycle life, charging efficiency, and maintenance requirements. Balancing these factors within your budget is key to finding the right fit for your system.

What are the advantages of lithium batteries for off-grid solar applications?

Lithium batteries stand out for their efficient energy density, lightweight, and minimal maintenance. This makes them ideal for solar off-grid applications, where space and reliable power are valued.

How many batteries are needed to sustain a household’s energy needs in an off-grid setting?

The number of batteries required is dependent on your household’s energy consumption, the capacity of the batteries chosen, periods of peak power usage, and your target autonomy days without sunshine.

What are the cost considerations when choosing the best solar battery for an off-grid cabin?

The initial cost of solar batteries is significant but consider the long-term value. Lithium-ion and LiFePO4 batteries may have higher upfront costs but provide longer lifespans and better performance, potentially offering greater financial benefits over time.

Wilderness Survival Experts: Essential Skills for the Great Outdoors

Understanding wilderness survival skills is essential when you find yourself in the great outdoors, especially in situations where you’re off the beaten path or facing unexpected challenges. Wilderness Survival Experts are not just adventurers; they are knowledgeable individuals who have honed their skills through extensive training and real-life experiences. They know how to utilize nature’s resources to build shelters, forage for food, and ensure safety from wildlife.

Wilderness Survival Experts Cover Image

The guidance of wilderness survival experts can be valuable whether you’re a seasoned outdoor enthusiast or planning your first backcountry trip. By learning from those who have navigated the harshest environments, you can adopt techniques that could one day prove to be lifesaving.

From Ernest Shackleton’s legendary Antarctic expedition to modern survival instructors like Dave Canterbury, there is a rich history and a wide array of survival strategies to explore.

Gaining insights from these experts can empower you to approach nature with respect and preparation. Their combined wisdom on survival principles can help you understand what gear to bring, how to read the land, and the mindset needed to overcome adversities in the wilderness.

Becoming acquainted with their teachings could make the difference between thriving in the wild and facing dire consequences.

Essentials of Wilderness Survival

In wilderness survival, preparing with the right mindset, mastering basic skills, and understanding emergency signaling are crucial. Your life could depend on how well you navigate these essentials.

Survival Mindset

Maintaining a positive attitude amid adversity is the cornerstone of survival. You must manage panic by staying focused and calm, which conserves energy and promotes rational decision-making. Embrace the idea of perseverance; survival is often a matter of persisting despite the odds.

Basic Survival Skills

Shelter, water, fire, and food are your main priorities in the wild. Your ability to find or create shelter protects you from the elements. Knowing safe methods to purify water prevents dehydration and illness.

Efficient fire-building techniques are vital for warmth, cooking, and safety. Lastly, acquire foraging and hunting knowledge for sustenance.

  • Shelter: Leverage natural materials or a tarp to insulate and protect from weather.
  • Water: Use boiling, chemical tablets, or filters to purify.
  • Fire: Carry a lighter, matches, or know friction methods.
  • Food: Identify edible plants or set traps for protein sources.

Emergency Signaling Techniques

When lost or in danger, make your location known through visual or audio signals. A mirror to reflect sunlight can alert rescuers from afar during daylight.

At night, create bright, controlled fires or employ flares if available. Sound carries well, so whistles or banging metal objects should be used to send distress signals.

Wilderness Survival Expert SOS signal
  • Visual: Mirrors, bright clothing, fire, or SOS patterns with rocks or logs.
  • Audio: Whistles, SOS signal (··· — — — ···), or banging items together.

Shelter and Protection

In wilderness survival, your ability to create a stable shelter can mean the difference between comfort and exposure to harsh conditions. This section will guide you on strategically choosing a shelter location, ensuring insulation and heat retention, and securing protection from the elements.

Choosing a Shelter Location

When selecting a location for your shelter, consider the proximity to resources such as water and firewood, but avoid areas prone to natural dangers like flooding or avalanches. You’ll want a spot that has natural shielding from wind, preferably with materials nearby to construct your shelter.

For instance, a round lodge provides excellent wind resistance and can be built with materials such as branches and foliage found in your immediate vicinity.

Insulation and Heat Retention

To maintain body heat, your shelter must be well insulated. Utilize available resources like leaves, grass, or even snow for insulation material. A basic frame shelter built against a fallback, such as a large tree or boulder, creates a foundation upon which you can add insulating materials.

Emphasize creating a thick layer of insulation between you and the ground, as the earth absorbs body heat rapidly.

Protection from the Elements

Your shelter should safeguard you against wind, rain, and the cold. When building, create a structure such as a tarp shelter, which uses minimal resources—a plastic tarp and some cordage—for significant protection.

In snowy environments, a circular, igloo-like shelter can prevent snow accumulation, effectively protecting you from the elements. Always angle the entrance away from prevailing winds and reinforce the shelter’s walls to resist inclement weather.

Water Procurement and Purification

In wilderness survival, securing a clean water source and knowing how to purify it are vital skills. These steps ensure that the water you drink will not harm your health.

Locating Water Sources

You can increase your chances of finding water by observing the terrain and wildlife behaviors. Look for areas with lush vegetation, as they often indicate the presence of water.

Valleys or low-lying areas where water naturally collects may also hold potential sources. Streams, rivers, and lakes are obvious choices, but remember to check for morning dew or rainwater trapped by foliage.

Water Purification Methods

Once you’ve located a water source, it’s crucial to purify it to remove any harmful substances.

Wilderness Survival Experts be sure to have purified water at all times
  • Boiling: Boiling water for at least one minute kills most pathogens.
  • Chemical Purification: Products like water purification tablets or household bleach can disinfect water effectively. Add half a teaspoon of bleach per five gallons of water, or double the dose if the water appears cloudy.
  • Filtration: Using a water filter can physically remove particles and many pathogens from water.

Water Storage Solutions

How you store water can affect its safety and availability.

  • Bottles or Canteens: Opt for durable materials that are easy to carry.
  • Collapsible Containers: These are lightweight and can accommodate varying water volumes.
  • Water Bladders: Suitable for larger quantities, bladders are preferable for setting up a base camp.

Remember, in the field of survival, your knowledge and skills in water procurement and purification can make a critical difference. Stay informed and practice these techniques to ensure your resilience in the wild.

Food Scavenging and Hunting

In wilderness survival, your ability to find food is crucial. Knowing what plants are safe to eat, how to effectively trap or fish, and mastering various hunting techniques will determine your success and survival.

Edible Plant Identification

Identify edible plants by studying reliable resources like the “art of scavenging for food in the wilderness”. Learn the shape, color, and texture of plants that are safe to consume. Always double-check with a reference to avoid poisonous look-alikes.

Safe Bets:

  • Dandelions: Recognizable by their yellow flower, all parts are edible.
  • Cattails: Found near wetlands, the roots, shoots, and pollen heads can be eaten.

Dangerous Plants to Avoid:

  • Poisonous Berries: Brightly colored berries such as holly can be toxic.
  • Deadly Nightshade: Dark berries and bell-shaped flowers are telltale signs.

Trapping and Fishing

Build traps or fish using makeshift tools to secure a meal without expending much energy. For trapping, construct simple snares from wire or cordage at game trails or burrow entrances. When fishing, use hooks made from bone, wood, or fashioned from safety pins, baited with worms or small insects.

Trap Types:

  • Deadfall Trap
  • Snare Trap
  • Cage Trap

Fishing Methods:

  • Spearfishing
  • Hand Fishing
  • Improvised Fishing Rod

Hunting Techniques

Master stealth and patience for hunting. Aim for small animals, which are more abundant and require less energy to catch. Understand animal behaviors and habitats; position yourself downwind to stay undetected.

Hunting Tips:

  • Move Slowly: Avoid quick movements that can startle animals.
  • Camouflage: Use mud, plants, or clothing to blend with the environment.

Weapons to Consider:

Wilderness Survival Experts bow and arrow
  • Bow and Arrow
  • Sling
  • Homemade Spears

Remember, respect local regulations and protected species wherever you are. Your survival could depend on these skills, so practice them responsibly.

Fire Creation and Management

Mastering fire creation and management is a critical skill set for any wilderness survival situation. It’s about ensuring you can start a fire efficiently and keep it going safely for warmth, cooking, or signaling.

Fire-Building Fundamentals

First, you need to understand the science of fire. The three components of a fire are fuel, heat, and oxygen. Your fire-building process begins with gathering the right materials: start with tinder, which are easily combustible materials that catch fire quickly.

This is followed by kindling, small sticks, and twigs that will burn with a little encouragement. Finally, fuel wood, larger pieces that will burn longer and sustain your fire.

When building your fire, structure is important. Create a stable base and arrange your tinder, kindling, and fuel efficiently. Traditional lay designs include the teepee, lean-to, and log cabin, each with its own advantages depending on conditions and purpose.

Maintaining a Fire

Once lit, your fire requires attention to maintain. You’ll need to progressively add kindling and fuel while also ensuring it doesn’t smother itself. Balancing the fire triangle elements—heat, fuel, and oxygen—is key.

  • Add small sticks before larger logs.
  • Allow space between logs for airflow.
  • Monitor the flames, don’t let your fire become too large or too small.

Discovering the nuances of fire maintenance takes practice. For example, you may need to shield the flames from the wind or ensure the fire is receiving enough oxygen by gently blowing on it.

Fire Safety

Safety must be your top priority; a fire can become dangerous quickly. Always build your fire away from overhanging branches and dry brush. Keep water or dirt handy to extinguish flames if necessary.

Follow these guidelines:

  • Clear a wide area around your fire site.
  • Never leave your fire unattended.
  • Completely extinguish the fire before leaving—drown, stir, and feel.

For an in-depth explanation of the tools and techniques for fire starting, consider fire starting techniques. It’s not just about survival; it’s about responsible wilderness stewardship.

Navigation and Orientation

Mastering navigation and orientation is a cornerstone of wilderness survival. Proficiency in using environmental cues, reading topographical maps, and navigating by celestial bodies greatly enhances your ability to thrive in the wild.

Using Natural Landmarks

In wilderness survival, you can utilize prominent natural landmarks as guideposts. Rivers, mountain ranges, and distinctively shaped trees can aid in maintaining your orientation.

For example, a river flowing in the direction you wish to travel provides a natural path to follow. Always be aware of your surrounding landmarks to keep a mental map of your location.

Map and Compass Basics

Understanding how to combine a topographical map with a compass is essential. Firstly, align the map with true north using your compass. Identifying major terrain features on the map and correlating them with your environment helps pinpoint your position. Be mindful to:

Wilderness Survival Experts always have a compass
  • Align the compass’s orientation arrow with the map’s north.
  • Place the compass edge along your desired route.
  • Rotate the azimuth ring until the north lines on the compass align with the map’s meridian lines.

This will give you the direction you need to head in while on the ground.

Stargazing for Direction

The night sky is a reliable navigation tool if you learn the key constellations. The North Star, Polaris, is nearly aligned with Earth’s north pole. Locate the Big Dipper constellation, find the “pointer” stars at the edge of the dipper’s cup, and follow their line to reach Polaris.

In the Southern Hemisphere, use the Southern Cross to approximate south; drawing a line through the longer axis of the cross and extending it downwards leads close to true south.

First Aid and Health

In the wilderness, first aid proficiency can mean the difference between life and death. Your ability to promptly and effectively administer first aid and handle health emergencies is crucial.

Basic First Aid Procedures

You have the power to stabilize a person who is injured or experiencing a medical emergency until professional help can be reached. Remember to size up the scene for safety, then identify life threats.

A focused assessment should follow: perform a head-to-toe check, record vital signs, and take the patient’s history. Those steps are your initial action plan.

Handling Common Injuries

For common injuries like sprains or fractures, proper immobilization is key. Learn to splint a limb to prevent further damage. In cases of severe bleeding, applying a tourniquet properly can save a life. Remember, for neck injuries, keep the patient still to stabilize a neck injury effectively. These skills are life-saving and essential for anyone venturing into remote areas.

Preventing Illness and Infection

Prevention is your best defense against illness and infection in the wild. Ensure all wounds are cleaned with water and soap or a suitable disinfectant. Applying sterile dressings is important to protect against infection.

Be aware of signs of infection, such as redness, swelling, or warmth, and seek medical attention if symptoms persist after initial care. Always prioritize hygiene, even in the wilderness, to reduce risks of illness.

Survival Gear and Tools

When facing the wilderness, your survival often hinges on having the right gear. Here is what you need to make it through challenging outdoor situations.

Essential Gear List

  • Navigation: Compass and maps, or a GPS device
  • Light: LED Flashlight or headlamp, with extra batteries
  • Fire: Waterproof matches, lighter, fire starter
  • Shelter: Tent, space blanket, or tarp
  • Cutting Tool: Knife or multi-tool
  • Communication: Whistle or mirror
  • First-Aid Supplies: Bandages, antiseptics, and medicine
  • Food: High-energy, non-perishable, easy-to-prepare items
  • Water: Filtration system, purification tablets, and container

Usage of Multi-Tool Devices

Multi-tool devices are versatile pieces of your survival kit. They can serve as pliers, scissors, screwdrivers, and blades in one compact tool. This versatility makes them invaluable for tasks like repairing gear, cutting materials, or even medical emergencies when your kit might not contain specific instruments.

DIY Survival Tools

You can fashion emergency gear out of accessible materials. For example, using a clear plastic bag and natural sunlight, you can create a solar still to collect fresh water.

Sturdy branches and vine can be used to construct a shelter frame or a makeshift splint if necessary. Remember, creativity could be as critical as your actual gear in a survival situation.

Rescue and Evacuation

When venturing into the wilderness, understanding the basics of rescue and evacuation is essential for your safety. Successful rescue operations rely on meticulous preparation, effective evacuation strategies, and smooth interaction with rescue teams.

Planning for Rescue

Before you embark on any wilderness adventure, you must have a well-thought-out rescue plan. Identify key information such as the local emergency services, potential hazards, and the steps to activate a rescue. Research has shown that comprehensive analysis of past search and rescue attempts can inform better planning for current outings.

Evacuation Strategies

Your evacuation strategies should include both immediate actions in the face of danger and structured approaches to assist rescuers. Expect to be immersed in a wilderness environment where you might need to apply techniques such as:

  • Self-evacuation: Quick movement away from imminent threats
  • Improvised stretchers: Using available materials to transport injured persons
  • Utilizing signals, such as mirror flashes or smoke, to alert rescue teams to your location

In some scenarios, as explained in a guide on mountain rescue evacuation, you might have to execute an evacuation without the aid of aircraft or vehicles due to weather conditions or terrain challenges.

Interacting with Rescue Teams

When interacting with rescue teams, clarity and accuracy in communication are paramount. Follow these best practices:

Wilderness Survival Experts rescue crew
  • Always stay visible and use established signals
  • Keep your group together and make sure everyone is accounted for
  • Convey the nature of injuries clearly if medical assistance is required

Learning and applying survival and medical training can greatly enhance your ability to interact effectively with rescue personnel. Their prompt response can be facilitated by your preparation and ability to provide precise information.

Frequently Asked Questions about Wilderness Survival Experts

In this section, you’ll find concise answers to some of the most common questions regarding wilderness survival experts, covering practical skills and knowledge essential for overcoming challenges in the outdoors.

What are the essential skills for wilderness survival?

Your survival in the wilderness hinges on mastering a core set of skills including building a fire, creating shelter, finding food and water, and knowing basic first aid. Each skill increases your chances of enduring harsh conditions when you’re far from civilization.

How do you find and purify water in the wild?

To find water, look for telltale signs in nature such as vegetation, the presence of animals, or dew. Once found, purify the water through boiling, chemical treatment, or filtration to remove pathogens and ensure its safety for drinking.

What are the basic techniques for building a shelter in nature?

When building a shelter, your priority is to insulate yourself from the ground, retain heat, and shield yourself from elements. Use natural materials like branches, leaves, and snow or debris to construct a barrier against the environment.

What is the importance of mental preparedness in survival situations?

Mental preparedness is crucial as it influences your ability to stay calm, make rational decisions, and maintain the hope necessary for survival. Effective stress management and a positive attitude greatly enhance your ability to cope with uncertainty and adversity.

How can you navigate without a compass in an unfamiliar wilderness area?

Navigating without a compass requires using natural indicators. The position of the sun, stars, the growth patterns of moss, and the flow of water can all provide clues to help orient yourself and find a direction.

What are the key differences between survival in different climates, such as desert versus arctic?

Survival techniques vary significantly between climates. In a desert, finding shade and water is imperative; conversely, in arctic conditions, you must prioritize maintaining your body heat and protecting yourself from frostbite and hypothermia.